Another Booties Fest
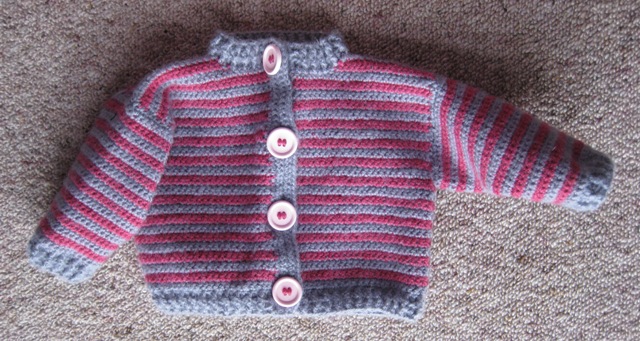
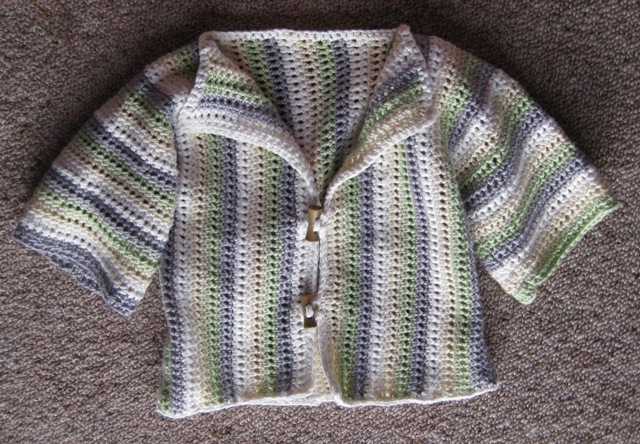
Something tells me my brain is going through baby fever. I wonder why :o) Taking a small break from booties for a while though. 3 sweet cardigans on their way now, boy do they take longer than booties.

Something tells me my brain is going through baby fever. I wonder why :o) Taking a small break from booties for a while though. 3 sweet cardigans on their way now, boy do they take longer than booties.

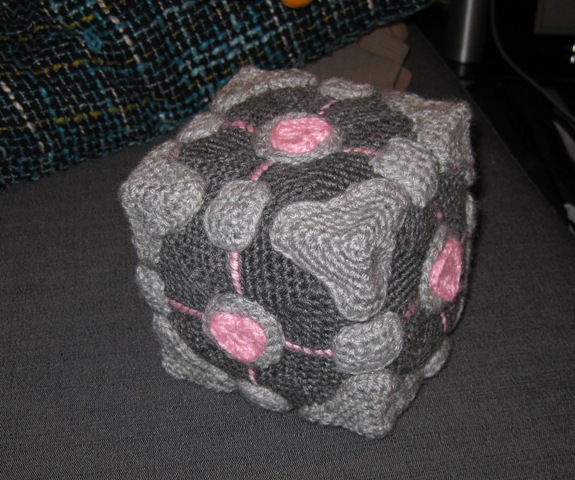
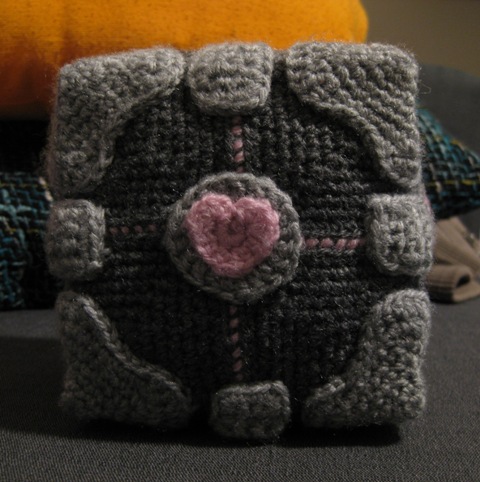
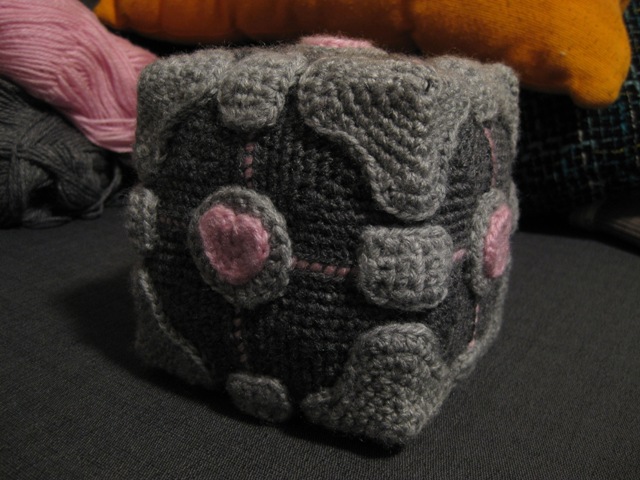
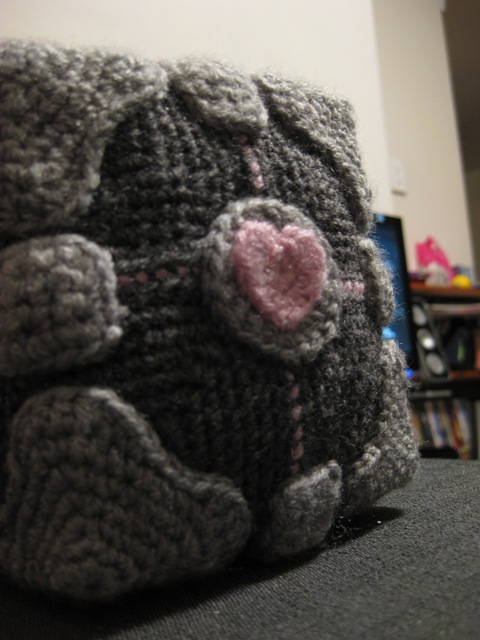
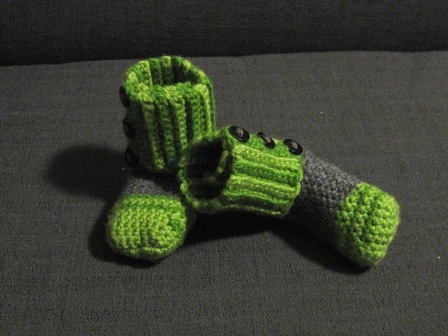
I spent the last week making this for my dad for fathers day. One crocheted companion cube. I took inspiration from a couple of other peoples takes on the companion cube:
One here: http://www.craftster.org/forum/index.php?topic=234375.0 A knitted one: http://knittedcompanioncube.blogspot.com/2007/12/knitted-companion-cube-assembly.html And another crocheted: http://www.joystiq.com/2007/12/27/today-in-joystiq-december-27-2007/
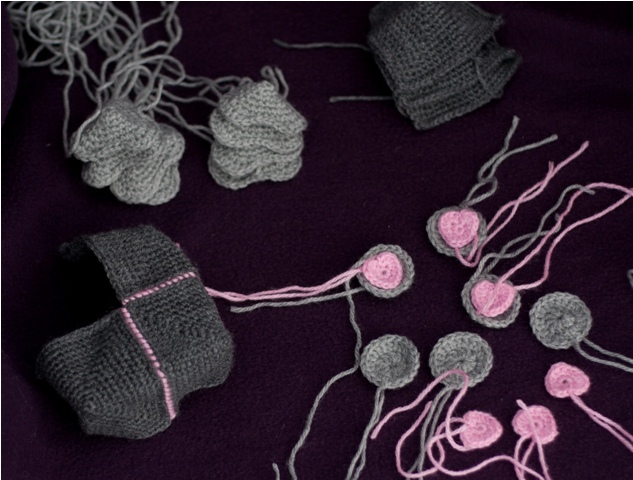
So I decided to come up with my own pattern for one. Mine is a miniture (About 15cm x 15ccm x 15cm) , as I only had 4 days to complete it and I’m not the fastest crocheter on the block. Anywho… here’s the result, and a link to my pattern in PDF form:
Companion Cube Pattern – Typo Fixed (Updated 21-04-2013)
Danielle (2011-04-29 00:45:27): Thank you for supplying your pattern! I've been searching for a smaller sized one, all the others I can find seem to be making really large cubes. This will make a brilliant gift for my boyfriend, so thank you for giving me somewhere to start with! :D
Shiri (2011-07-06 08:34:14): I love it! I actually saw an idea to stuff one with a cube of memory foamcut to the appropriate size and i think i'll try that!
Alexandra (2011-07-10 13:06:28): This is gorgeous! I'm definitely going to try this out as soon as I finish some projects.
Alexandra (2011-07-11 20:23:23): I hope you don't mind but I'm going to sell completed companion cubes to a few friends, and I will credit you many times over. :)
Beverley (2011-08-21 20:19:39): Hey, no worries at all, you can use the pattern however you wish. Share the Portal love :)
Retsnimel (2011-08-23 04:37:45): Thank you very much for this pattern !
Nichole (2011-12-01 16:24:09): Thank you so much for this pattern! I look forward to making it. This one looks the best by far! I will be giving it to my Portal loving friend for Christmas :D
Christian H (2011-12-28 14:48:58): I’ve looked at soo many other ones and this is by far my favorite! It’s neat, tidy, and not lumpy! I’m having a problem though. I can’t open the pattern. It’s not a problem with the pattern, it’s just that my computer opens it in an html format, which I can’t read. I don’t know what to do with that. Could you please email me the pattern? PRETTY PLEASE!
Enphra (2012-02-16 03:09:41): Thanks so much for sharing this pattern! I was wondering what kind of stitch you use to sew the light gray corners onto the dark gray ones? I just can’t get em to look as neat as the example pictures. :(
Beverley (2012-02-18 12:09:45): It was a while ago that I made this, so I'm not exactly sure what I did. I generally tend to just tack things together with a basic sort of running stitch though. I used light grey wool and just tried to hide the stitches in the last row of crochet around the light corner itself probably. Sorry not to be more help, good luck. :)
Beverley (2012-02-18 12:23:46): Hey Christian, I just emailed you the pattern. Sorry it took me so long :)
Enphra (2012-02-18 22:55:19): All right, I'll just keep trying things out until it looks good then, thanks for your answer. :)
Alexia (2012-04-07 12:49:32): Ahh I've been trying to crochet this, but i can't seem to figure out how to do the corners D:
Patricia (2012-04-30 14:36:37): On the pattern for the dark grey corners what is 3cs? The rest of the pattern uses all sc ; did you mean sc? I found instructions on how to do a cluster stitch which is abbreviated cs but its used for decreasing, not increasing.
Jason (2012-06-16 19:42:00): What is 3cs? I tried doing it as a cluster stitch and it ended up coming out very wrong but trying it with single crochet also came out wrong.
Paula (2012-06-20 09:38:20): This would make a great tissue box cover. Although the shape would be off a bit but you could add spacers. Can you tell I have been on a functional only kick here latly? I have way too many cute things just sitting around!
kat (2012-09-03 05:47:51): I have the same problem. the darkgrey edges are coming out wrong everytime. they are like a big circle with some little edges. thats not how they supposed to be mh? (; I would LOVE to do this but I don’t get how you did the edges. it would be awesome if you would answer me. thanks alot Kdot.
Brandy (2012-10-22 06:44:16): I love this! What adjustments would I have to make to make a large one, like 10 inches high?
red (2012-11-17 17:58:12): aaaaAHHHH I CAN'T GET THE LIGHT GREY CORNERS RIGHT
Heather (2012-11-30 05:45:14): Husband says this is perfect and that I must make one for daughter. They play the game together and have lots of fun. Thanks so much for sharing.
Laura (2013-03-22 09:43:24): I'm also wondering what "cs" is in the section for the dark corners. I haven't gotten to the 12 edge pieces yet, so I don't know what problems I may encounter there, but I can't figure out whether cs is a typo or some special corner stitch that isn’t detailed in the instructions. Please advise!!
Beverley (2013-04-21 14:05:05): Gosh, sorry everyone. I didn’t realise the massive repeated typo in my pattern. “3cs” should read “3sc”, so just 3 x single crochet in the same stitch. It’s been a long time since I made this so I’m afraid I can’t really offer much of a troubleshooting guide.
Tamara - Moogly (2013-06-25 04:18:46): This is fab! I featured the cube this morning on Moogly - Thanks so much for sharing your pattern!
Crystal (2013-07-04 11:12:12): Can someone please help me? I've gotten to the part where you make the light grey corners and I get confused at step 3: "ch1, (sc, 3sc, sc) around (15 sts). Sl to join." Does this mean the pattern goes ch1, (sc, 3sc, sc), (sc, 3sc, sc), (sc, 3sc, sc), (sc, 3sc, sc), Sl OR ch1, sc, 3sc, sc, 3sc, sc, 3sc, sc, 3sc, sc, ect., Sl
Tsukeeno's (2013-07-15 12:10:07): Wow, that looks AWESOME!!! I know it's been posted a long time ago, but I had to say it. Congratulations, you are great! ^.^ And @Crystal, it has to be the first one: ch1, (sc, 3sc, sc), (sc, 3sc, sc), (sc, 3sc, sc), (sc, 3sc, sc), Sl it’s the only way to end up with 15 stitches :)
Corey (2014-04-29 14:26:53): My apologies, I realize this post is several years old, but I would love to make this. It appears there's no longer a PDF link to click through to, unless I'm blind.
Sarah (2014-07-31 20:01:54): Could you email me the pattern? I want I make it as a baby gift for my cousin
Beverley (2014-09-09 19:58:21): Hi, pattern is linked above it's just hard to see because I really need to modify my blog style to highlight links. Here is is again: /wp-content/uploads/2010/09/CompanionCubeFixed.pdf
Beverley (2014-09-09 19:59:55): Hey, sorry for the lack of response. I'm well out of the habit of looking after my site. The pattern is linked just about the images. It is impossible to see as it’s not highlighted as a link in anyway. Next mission is to get to a computer and fix that. Anyway, here’s the link again:
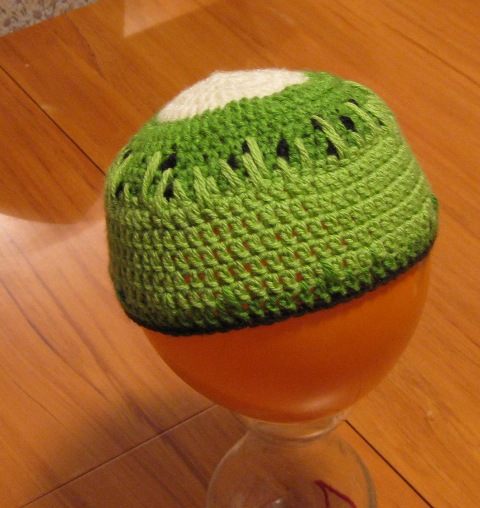
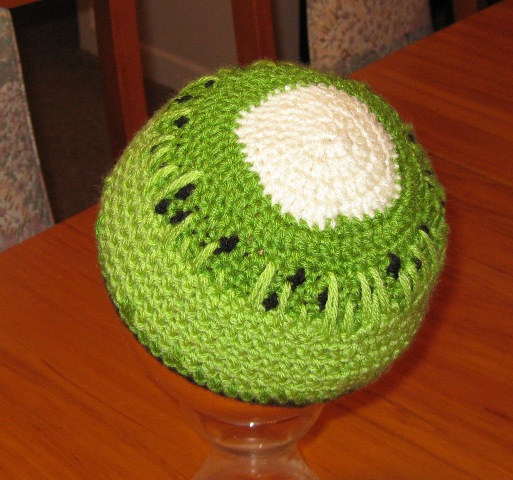
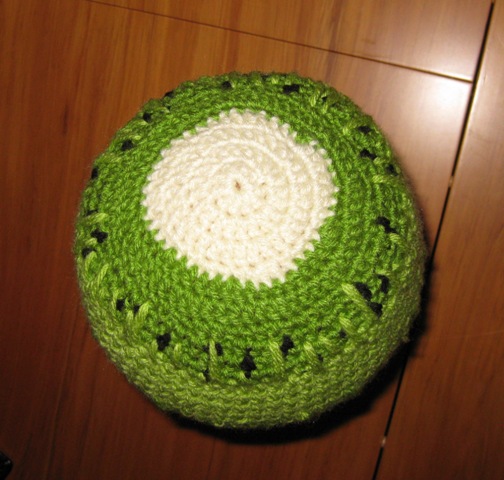
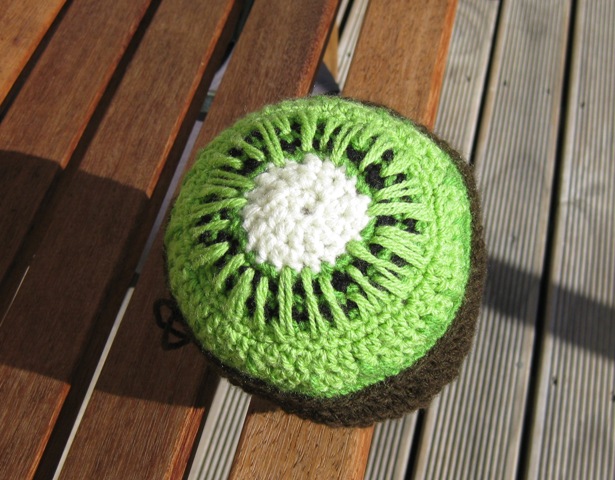
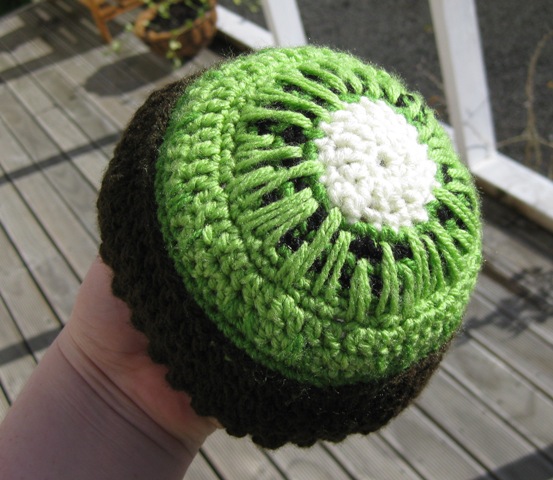
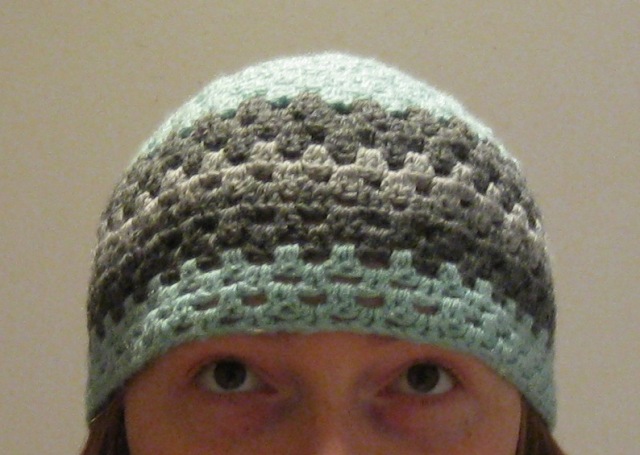
The fuzzy brown/grey wool used in the Hayley-Bear hat got me thinking about kiwifruit so here’s my next attempt at a themed beanie. I haven’t decided if I like it or not yet and I may have to have another go at capturing the likeness of the kiwifruit.
It’s hard to give a pattern for this one as it involved random choices of stitch, colour and spike-itude and I didn’t write anything down as I did it.
Thankyou to balloonie the balloon for modelling this creation for me.
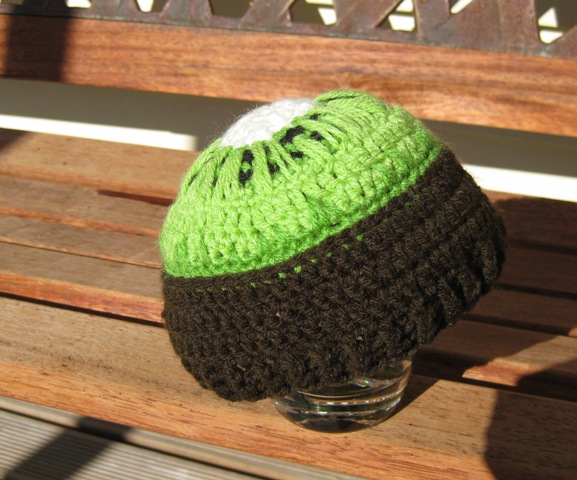
UPDATE: Attempt #2 now included. No pattern for this either.
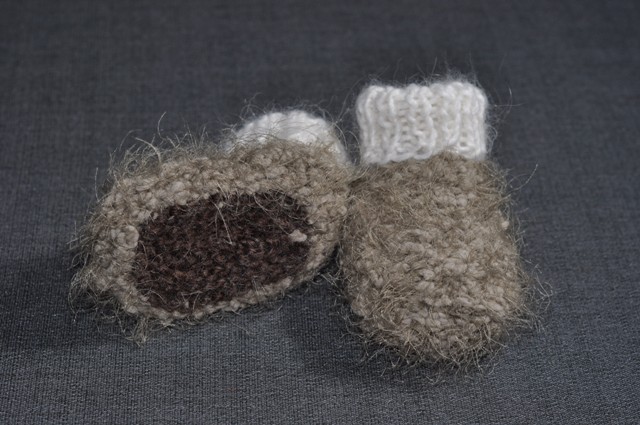
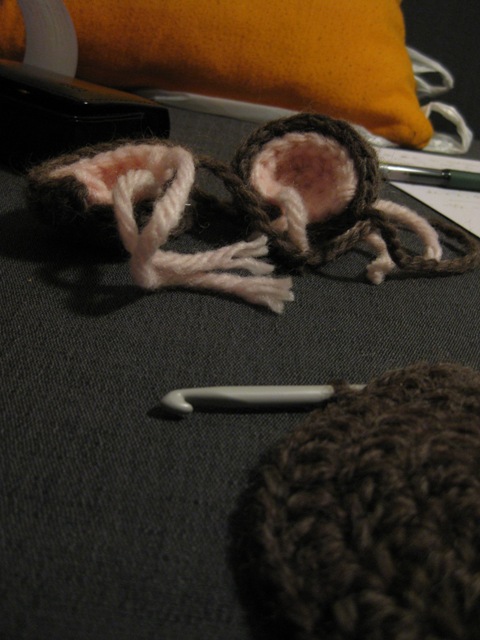
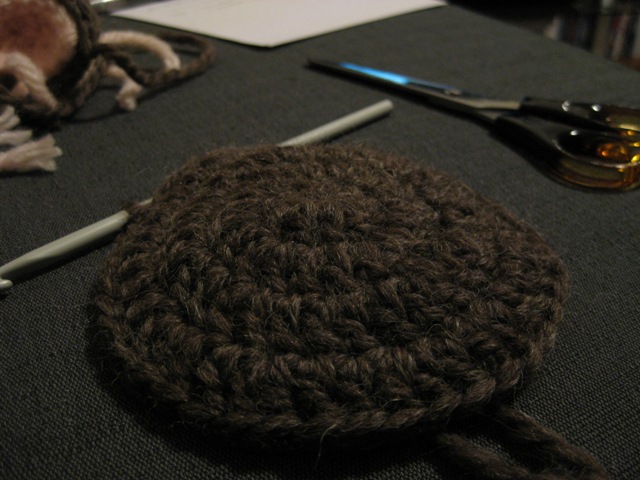
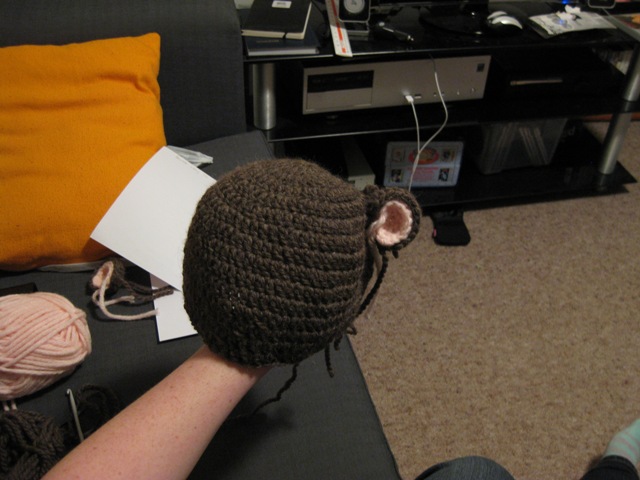
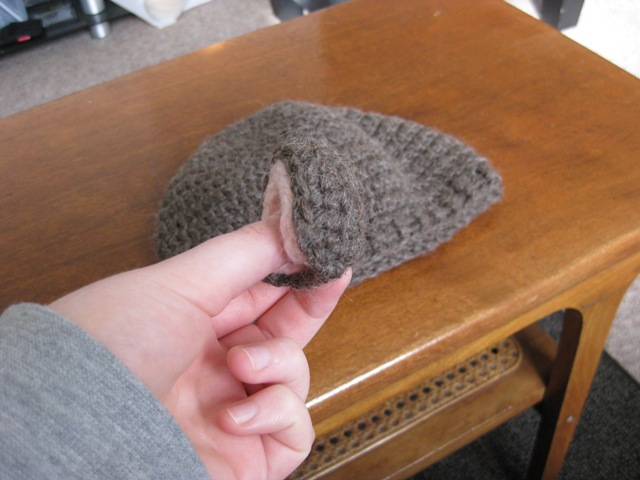
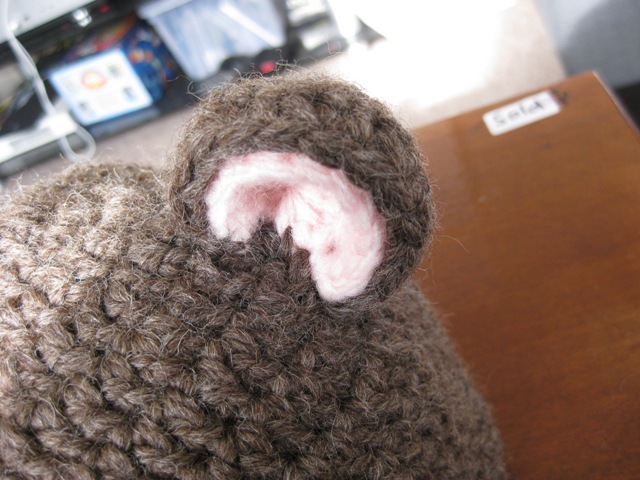
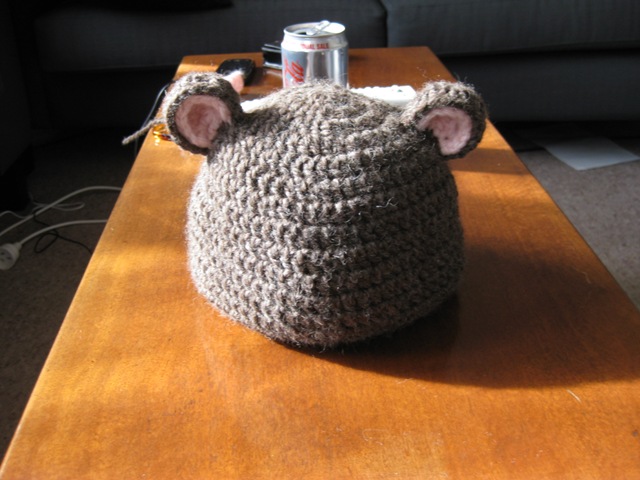
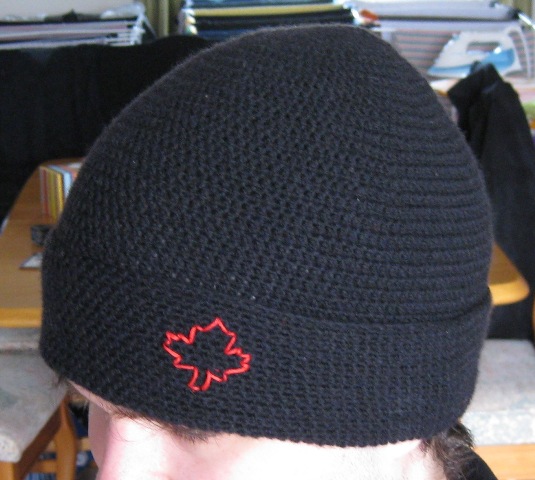
Just finished a teddy bear beanie for Hayley. It was super fun to make, I hope it fits! Brown wool is : Naturelle Chunky 14 ply 100% pure NZ wool. Pink wool is : Mill Shop, Quick Knit 45% acrylic, 45% wool, 10% mohair. (feels like plastic when crocheting though....)
Approx Size : Small-Medium Women's.
Pattern Follows: Pattern (In semi pattern-english. This is the first pattern I've written out so I hope it makes sense)
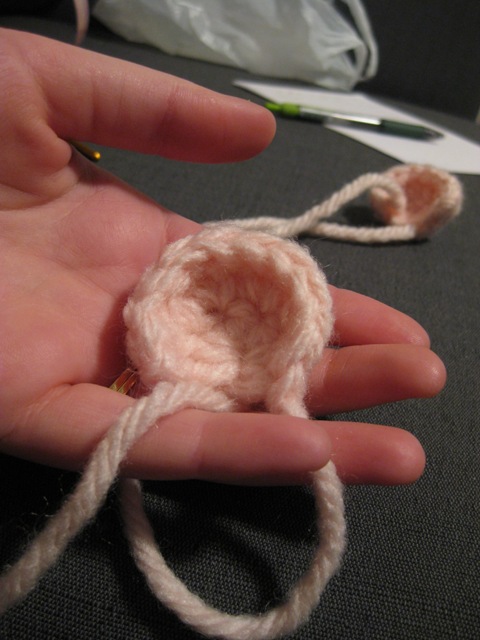
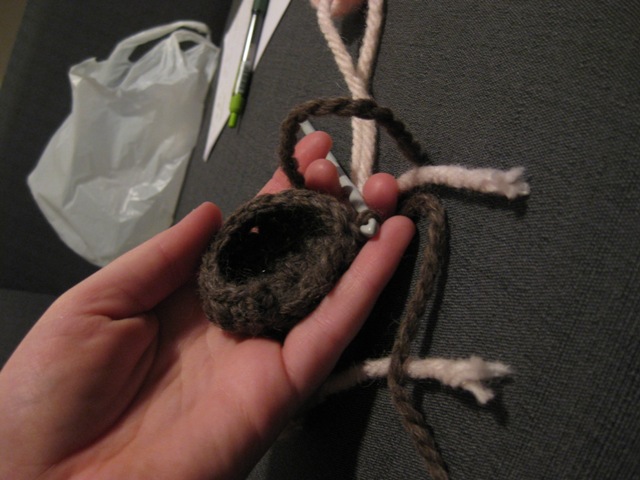
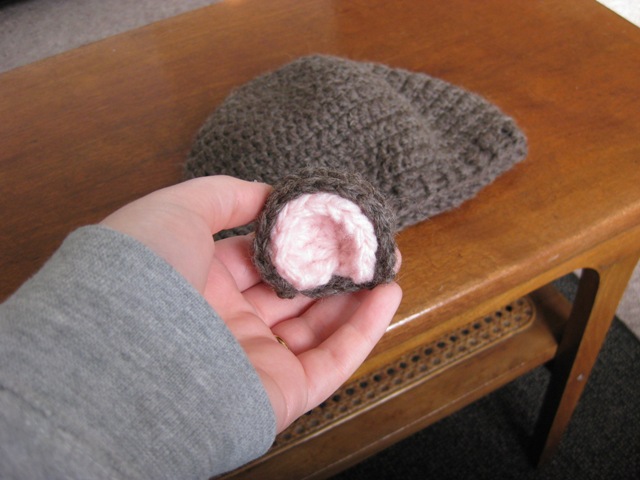
Teddy bear Beanie
Stitches
- Ch – chain stitch
- Sl – slip stitch
- Tr – treble crochet
- Dc – double crochet
- Fptr – front post triple
- Bptr – back post triple
Materials
100g 14 ply 100% wool, brown
- teeny tiny bit of quick knit chunky pink stuff
- 5mm crochet hook (for brown)
- 4mm crochet hook (for pink)

Outer Ear (Make 2 – using brown)
1. Ch 3, 8 tr in 3rd ch from hook. Join round with sl
2. Ch 2, 2 tr in each tr around. Join with sl
3. Ch 1, *1 dc in next tr, 2dc in next tr* repeat * 7 times
4. Ch 1 turn, *1dc in next tr, dc decrease next 2 tr* repeat 7 times fasten off.

Inner Ear (Make 2 – using pink)
1. Ch 3, 6 tr in 3rd ch from hook. Join round with sl
2. Ch1 turn, 2dc, tr, 2tr, 2tr, tr, 2dc in next 6 tr fasten off.

Hat Base
1. Ch3, 10 tr in 3rd ch from hook, join round with sl
2. Ch3, 2tr in each tr around, join with sl
3. Ch3, *tr, 2tr* all the way around. Join sl
4. Ch3, *tr, tr, 2tr* all the way around. Join sl
5. Ch3, tr around increasing every 5th (2tr in every 5th stitch). Join sl
6. Ch3, tr around increasing every 10th. Join sl
7. Ch3, tr around increasing every 15th. Join sl
8. Ch3, tr around increasing every 17th. Join sl
9. Ch3, tr around increasing every 20th. Join sl
10. Ch3, tr around. Join sl
11. Ch3, tr around. Join sl
12. Ch3, tr around decrease every 20th (tr decrease each 20th and 21st stitch together). Join sl
13. Ch3, tr around decrease every 18th. Join sl
14. Ch3, tr around decrease every 16th. Join sl
15. Ch3, tr around decrease every 14th. Join sl
16. Ch3, *fptr, bptr* all the way around. Join sl. Fasten off.

Attach Ears to base. With brown wool
Liana (2011-03-05 09:12:02): You have so good photos!!! But I am sorry-you don't write the size of hat and age of baby/ Can you please write me the sizes of children heads 0-3 m 3-6 m 6-12 m 1-2 years 2-5 years? but anyway You have good step by step tutorial!
Beverley (2011-03-05 12:28:25): Whoops, didn't realize I'd missed such a crucial piece of info. This pattern is actually for an adult hat. It's small-medium women's size.
Jen (2012-01-17 02:30:09): Hi there...love your hat, so I wanted to try to crochet one myself. I don't understand how you attach the inner to the outer ear...?
Beverley (2012-02-18 12:22:42): Glad you like it. When I made the ears the inner and outer ear fitted together quite snuggly, I just pushed the inner inside the outer and stitched both to the hat together by stitching through the base both at the same time, if that makes sense. To build the ears more securely you could try putting them together as I did by pushing the inner inside the outer, then stitching them together around the curve of the ear with something like a whip stitch using the brown wool. It'll be quite visible but if it's tidy should look fine.
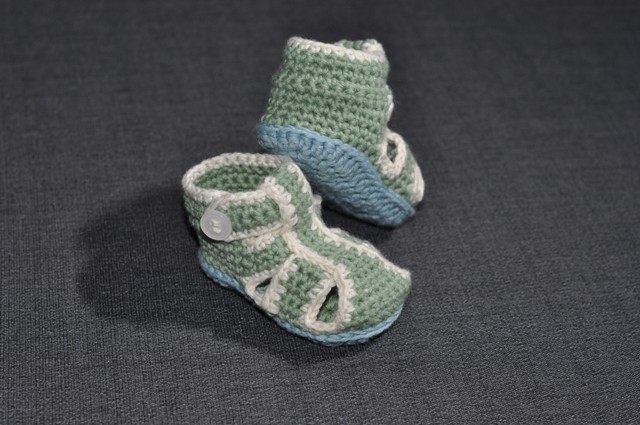
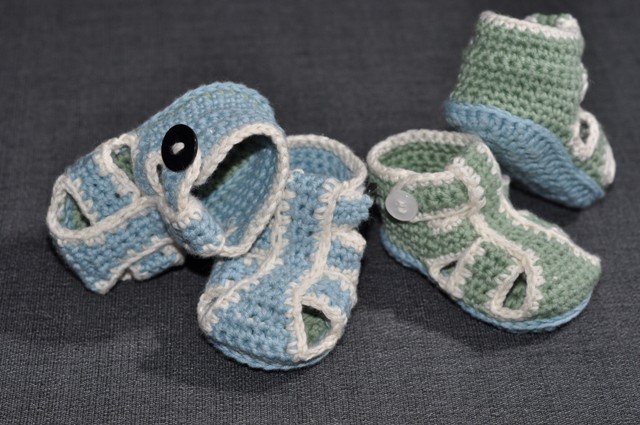
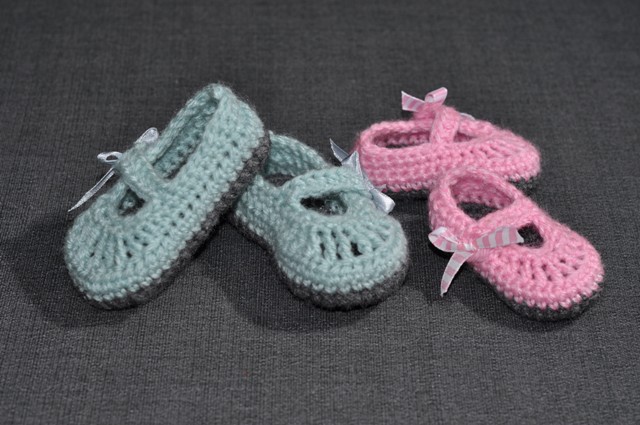
Over the past couple of months I've been trying my hand at non-bootie crochet projects aswell. These are mainly still baby related as they're nice, small projects that keep my interest long enough to get finished. I've also made a couple of grownup hats. Some projects I've made from free patterns on the interwebs (click the picture to follow the link), the rest were crochet-as-you-go sorta things.
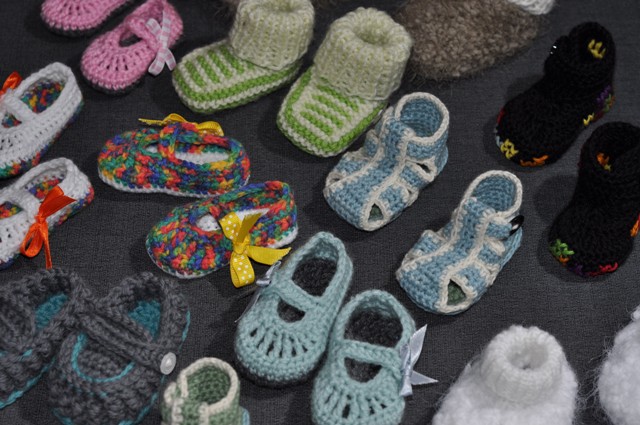
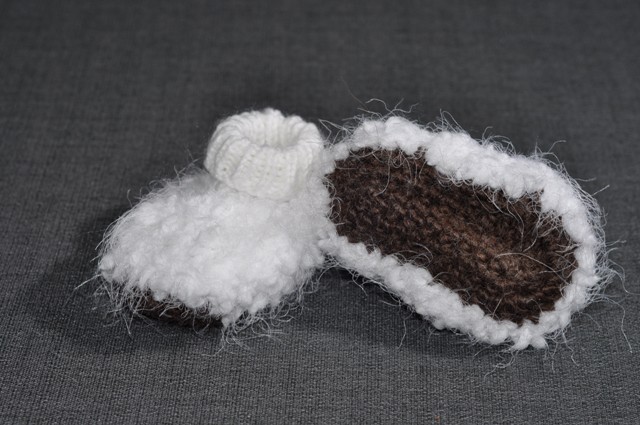
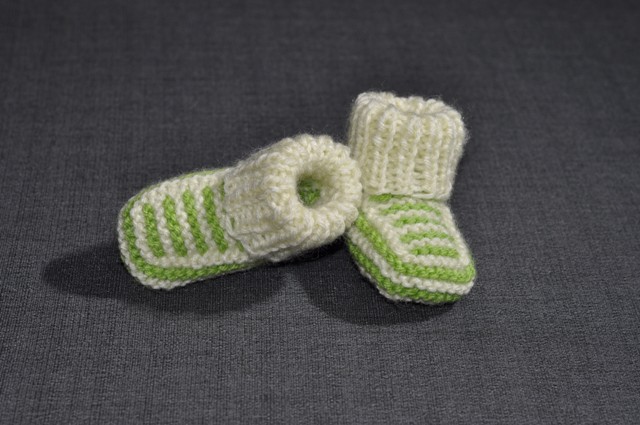
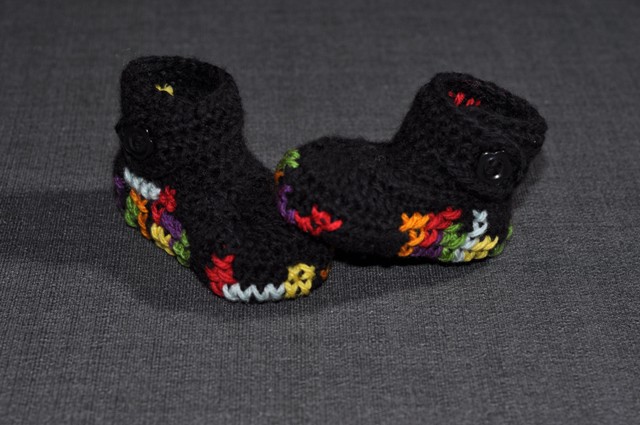
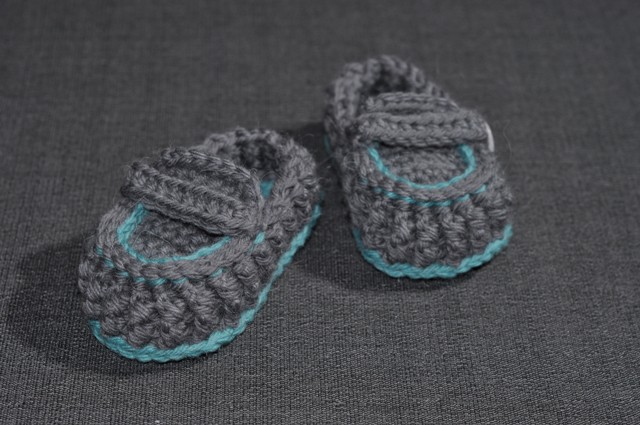
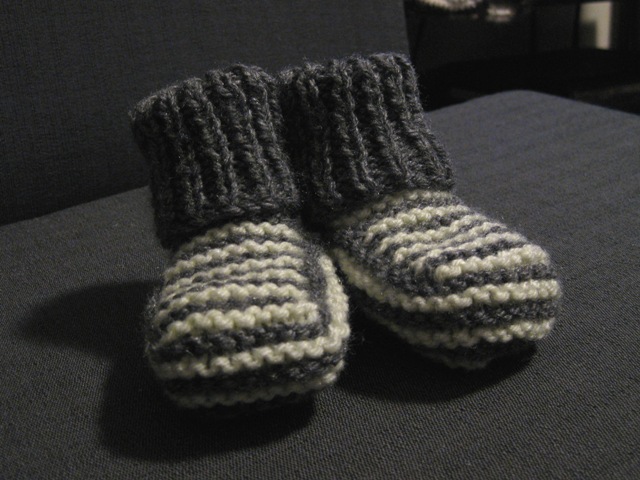
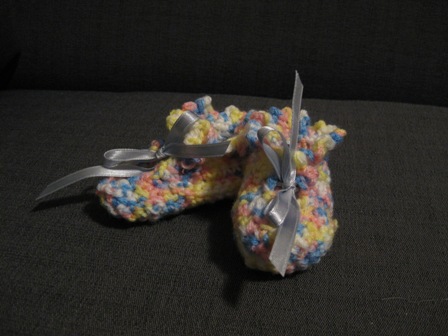
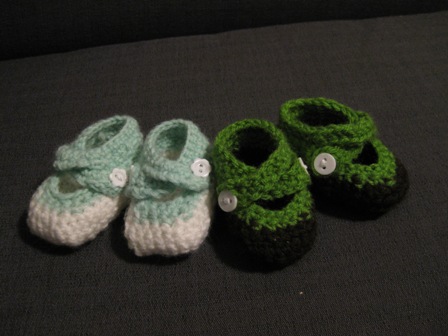
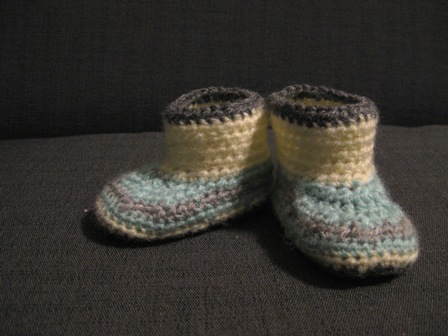
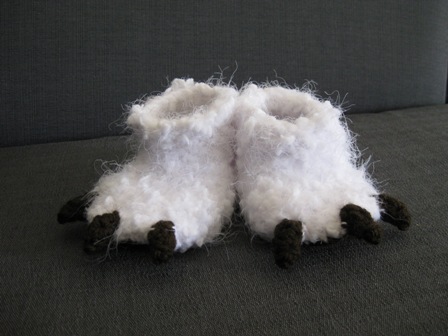
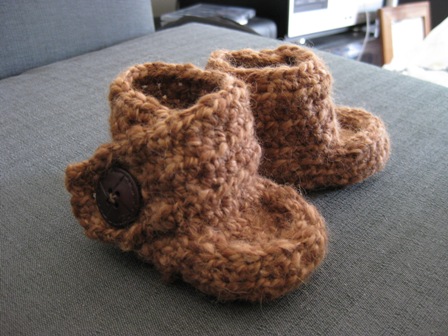
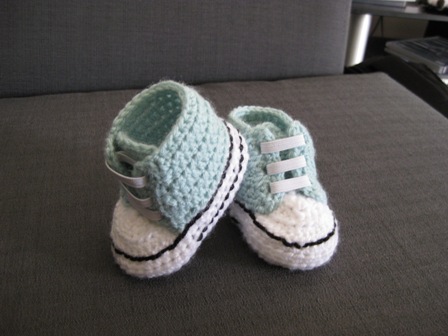
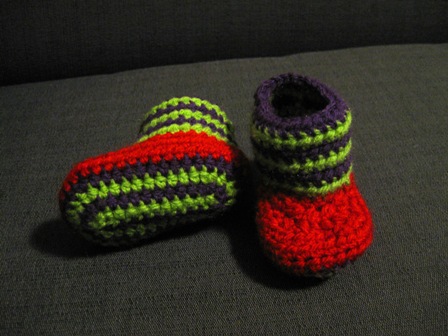
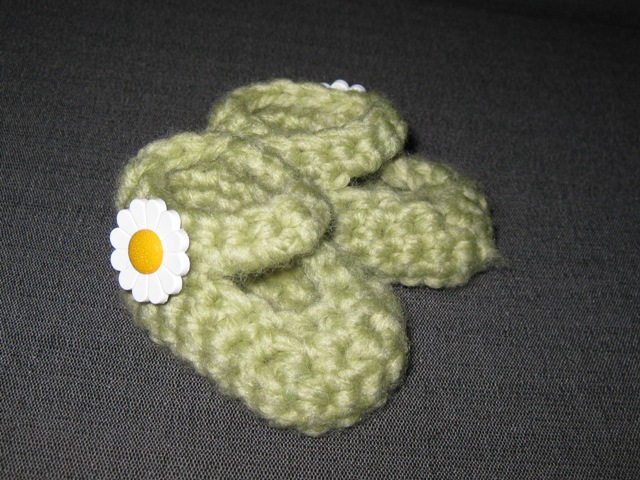
So, turns out I'm pretty addicted to crocheting booties. Here are my latest creations (excl. the wicked tetris booties I made, accidentally gave those away before taking a photo of them...)
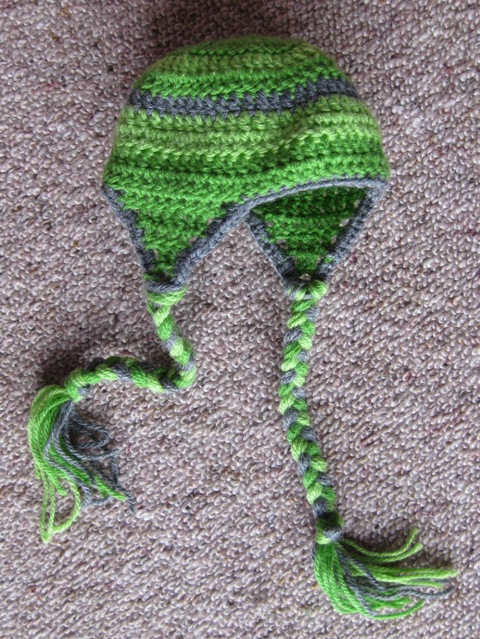
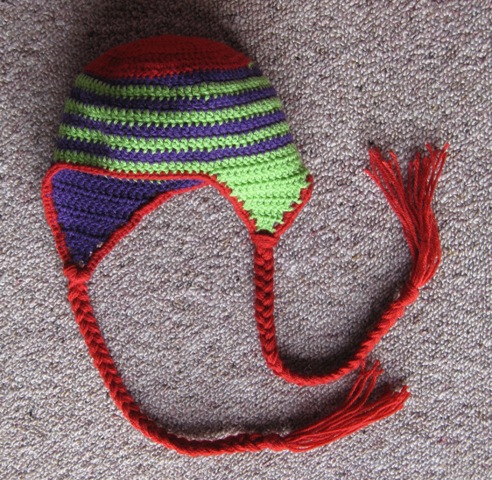
Recently, I’ve become addicted to crochet. It all started after watching an episode of Firefly. Jane recieved a present of a knitted orange hat with ear flaps. Suddenly I had an urge to knit. So I started knitting a really ugly brown scarf. It still isn’t finished and that was months ago. I couldn’t stand the monotony of knitting. I tried spicing it up by having a go at knitting a hat on circular kneedles. I finished that hat but it wasn’t a particularly fun process. And with that my affair with knitting was over. But I still wanted to make some wicked woollen clothing and accessories. So I decided to learn to crochet.
I started with some basic baby booties, because I was looking for a quick and easy project. Four pairs of booties later I was hooked (and had managed to freak out my fiance). I made a green hat next, though it was disappointing as I messed up the size. Then I experimented with granny squares in stylish greys. Granny squares are great and all, but so many colour changes leave so many loose ends. I don’t like dealing with loose ends, they take too long to weave away. So my next project was another hat. This time made using granny square stitches. It worked really well and it’s the first thing I’ve made that I’ve worn out in public.
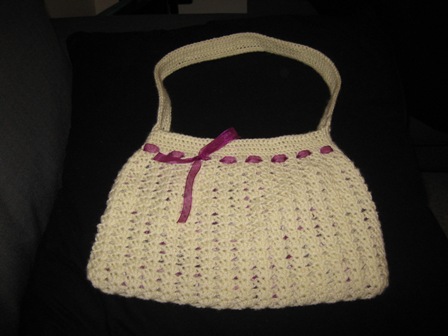
Anyway, that’s the not so brief history of my crochet hobby. A couple of weeks ago, my Grandpa came around for lunch and saw some crochet books that I had borrowed from the library. “Crochet Bags” was one of them. Nothing in it had really tickled my fancy but my Grandpa asked me to make a bag for his friend. He picked out an ugly looking one from the book but I vito-ed that. I then spent some quality time with google and found this awesome bag pattern: http://www.allcrafts.net/f.php?url=shortylamcrochet.blogspot.com/2006/11/nordstrom-hobo-bag.html#links
I changed the pattern a bit, used a smaller hook and just increased the number of stitched in every direction. This is the final product: